Dashboard Reporting
Connected Payments recommends using the Connected Payments dashboard for reporting. While this interface uses the API, it makes the reporting engine easier to use for all users without sacrificing flexibility and power.
You can access dashboard reporting through the token, transaction, and reports sections in the left-hand menu.
Creating a report - guide
Screenshots may not accurately reflect the dashboard at the time of reading as updates and UX improvements are continously implemented. If you believe these screenshots are incorrect please contact [email protected]
Navigating to create report
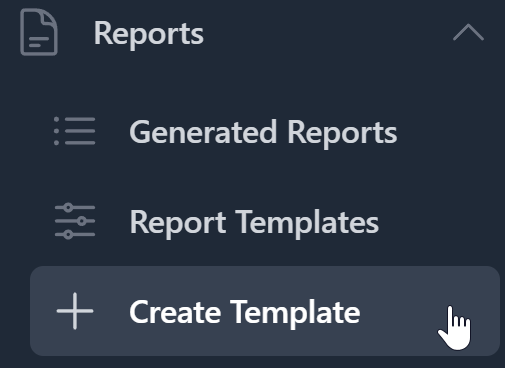
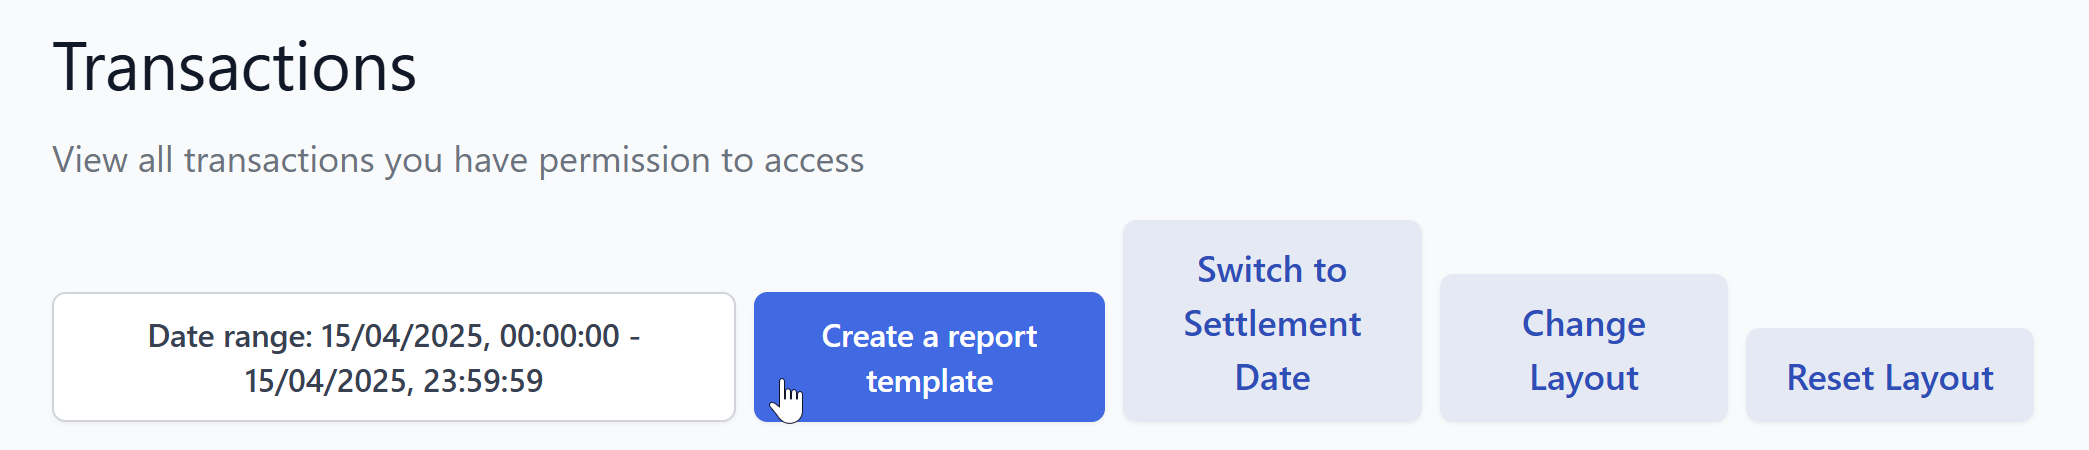
To create a reporting template, select the option Create Template on the left-hand side menu or the Create a report template button on the transaction/token pages.
Create template option:
Transaction/Token view option:
Name your report
Once you select create report you will need to name and give your report a description.
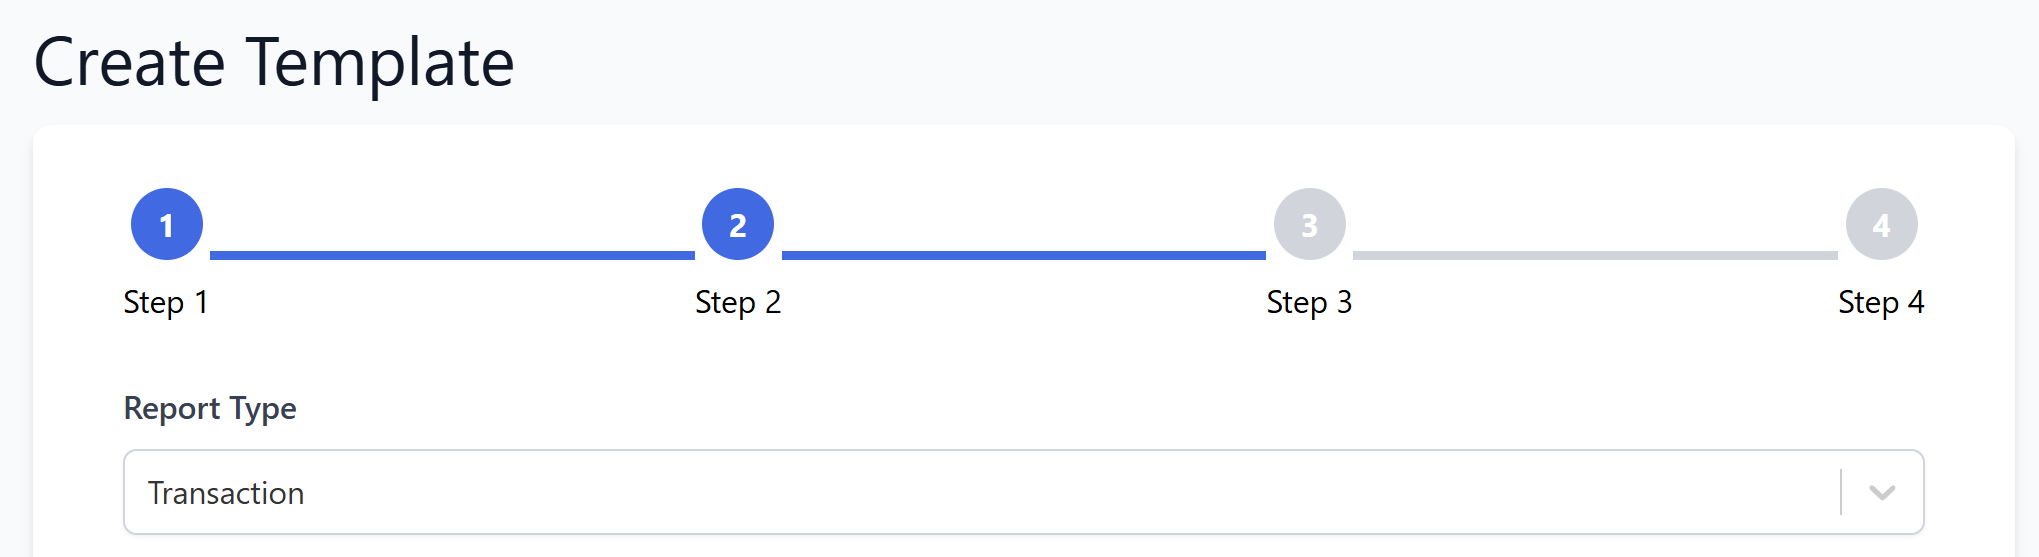
Select your report type
After naming your report you can select the type of report you're creating. In this case we are going to select Transaction but you could also select Token.
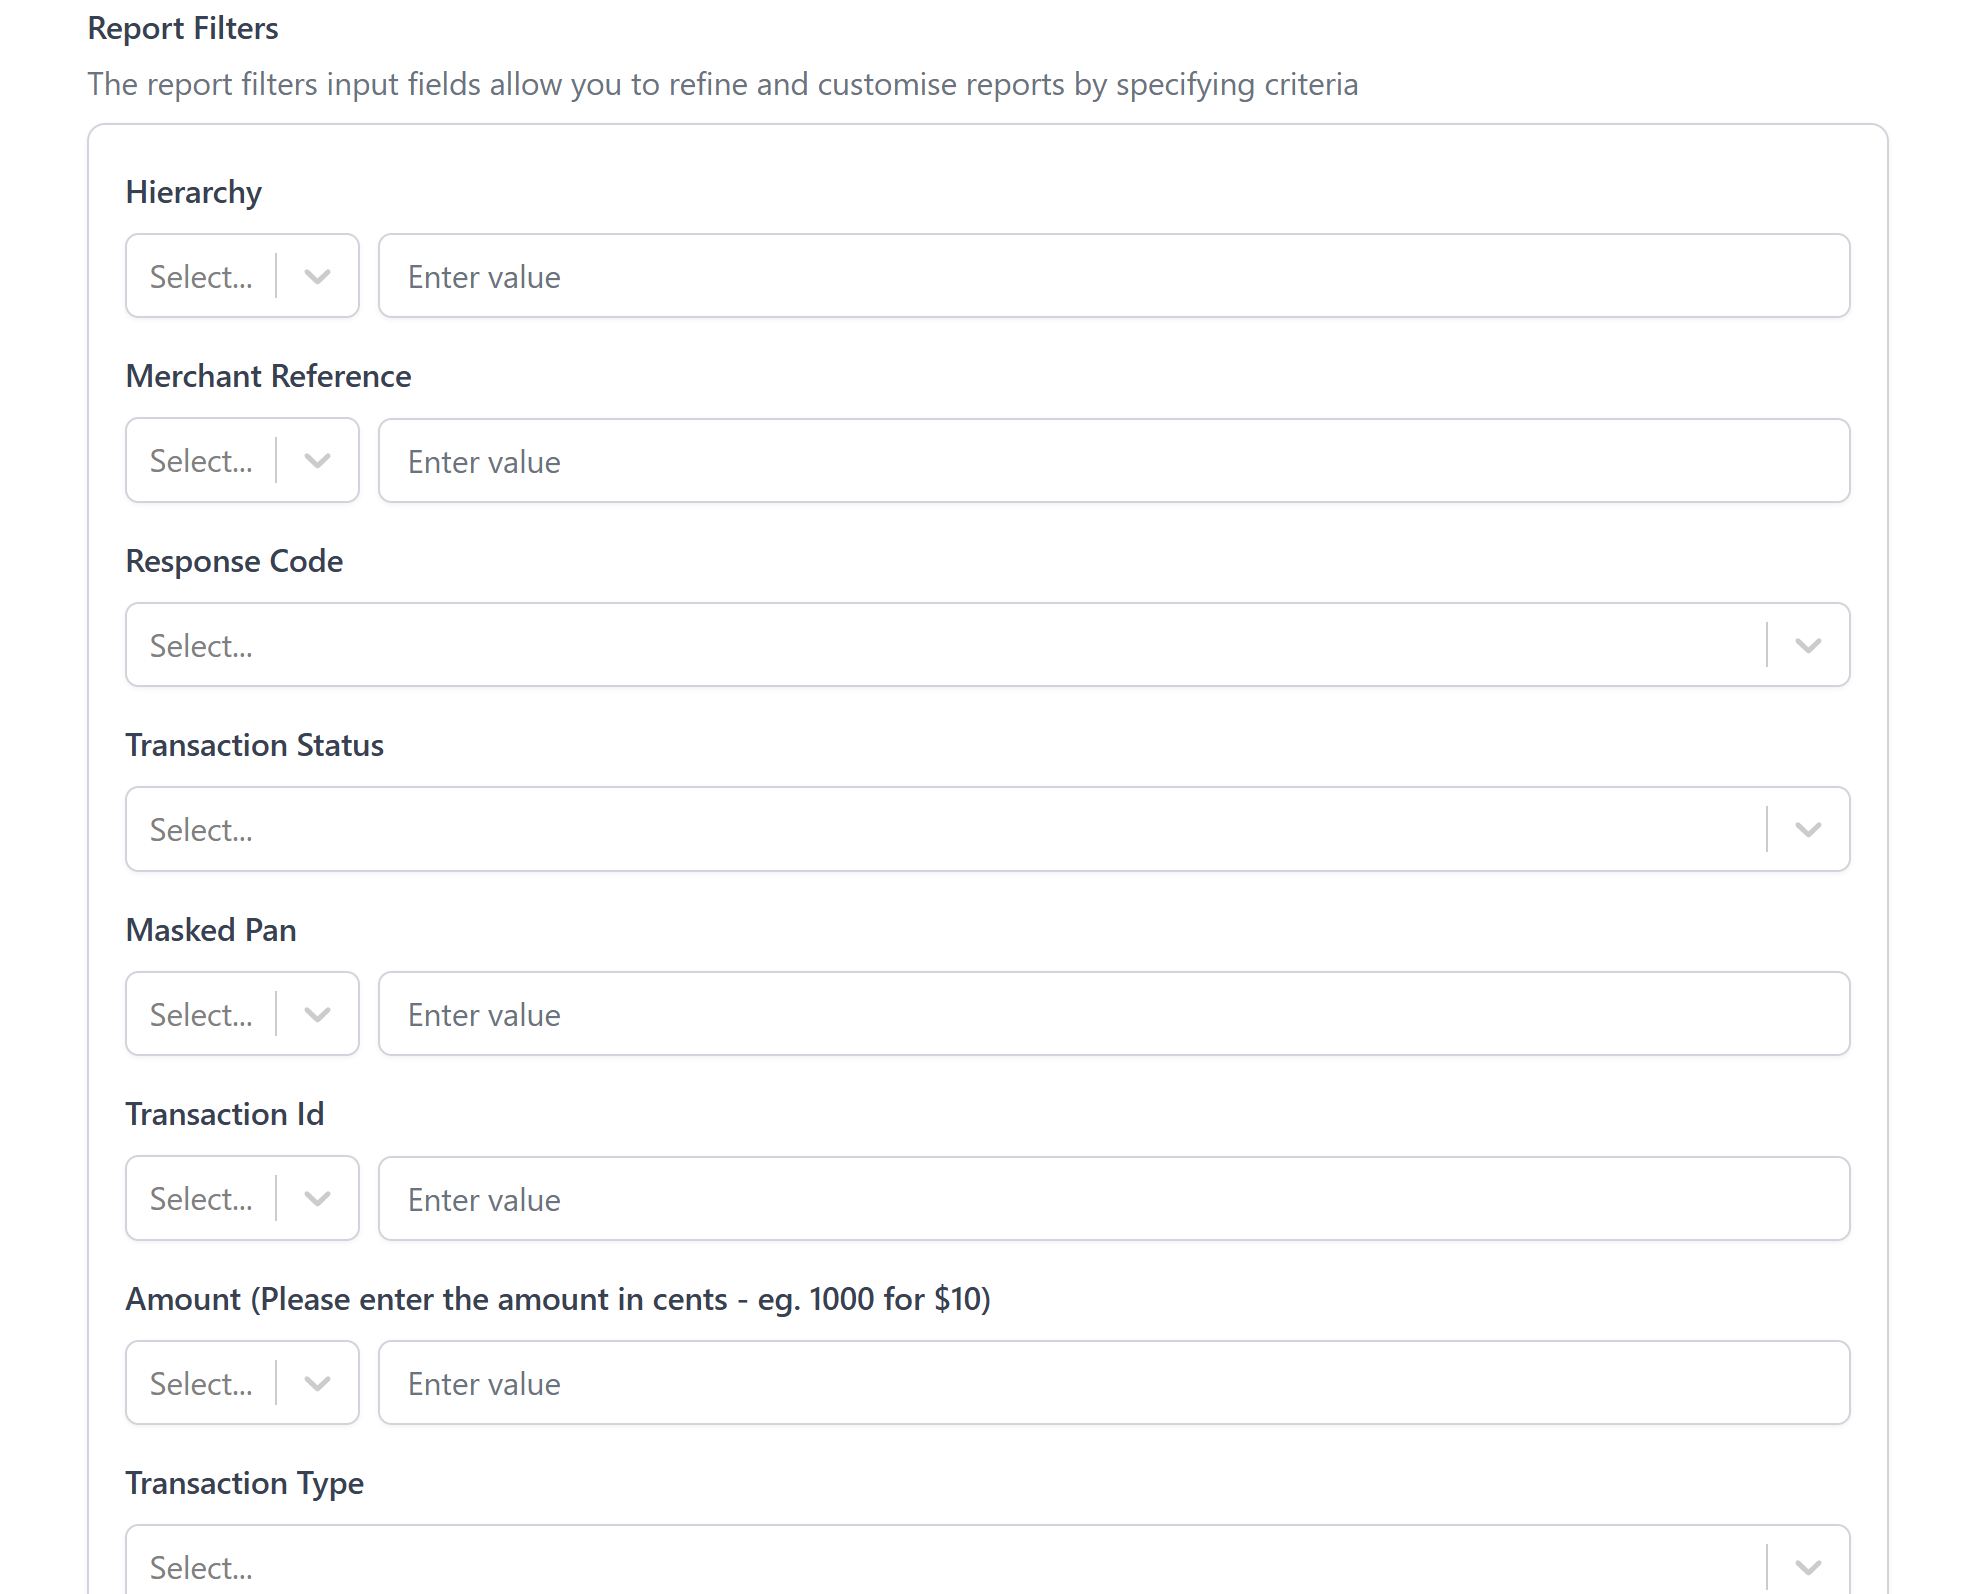
Report filters
You can add filters that will refine transaction results for the report to specific criteria. If you wish to receive all transactions, this section can be ignored.
Selecting your fields
On step 3 you can select what fields you want and map them to more column names that you would prefer. Alternatively, some templates are available for quick selection.
You MUST have fields mapped in this section to receive any data. Failure to do this will result in no results.
Selecting a template:
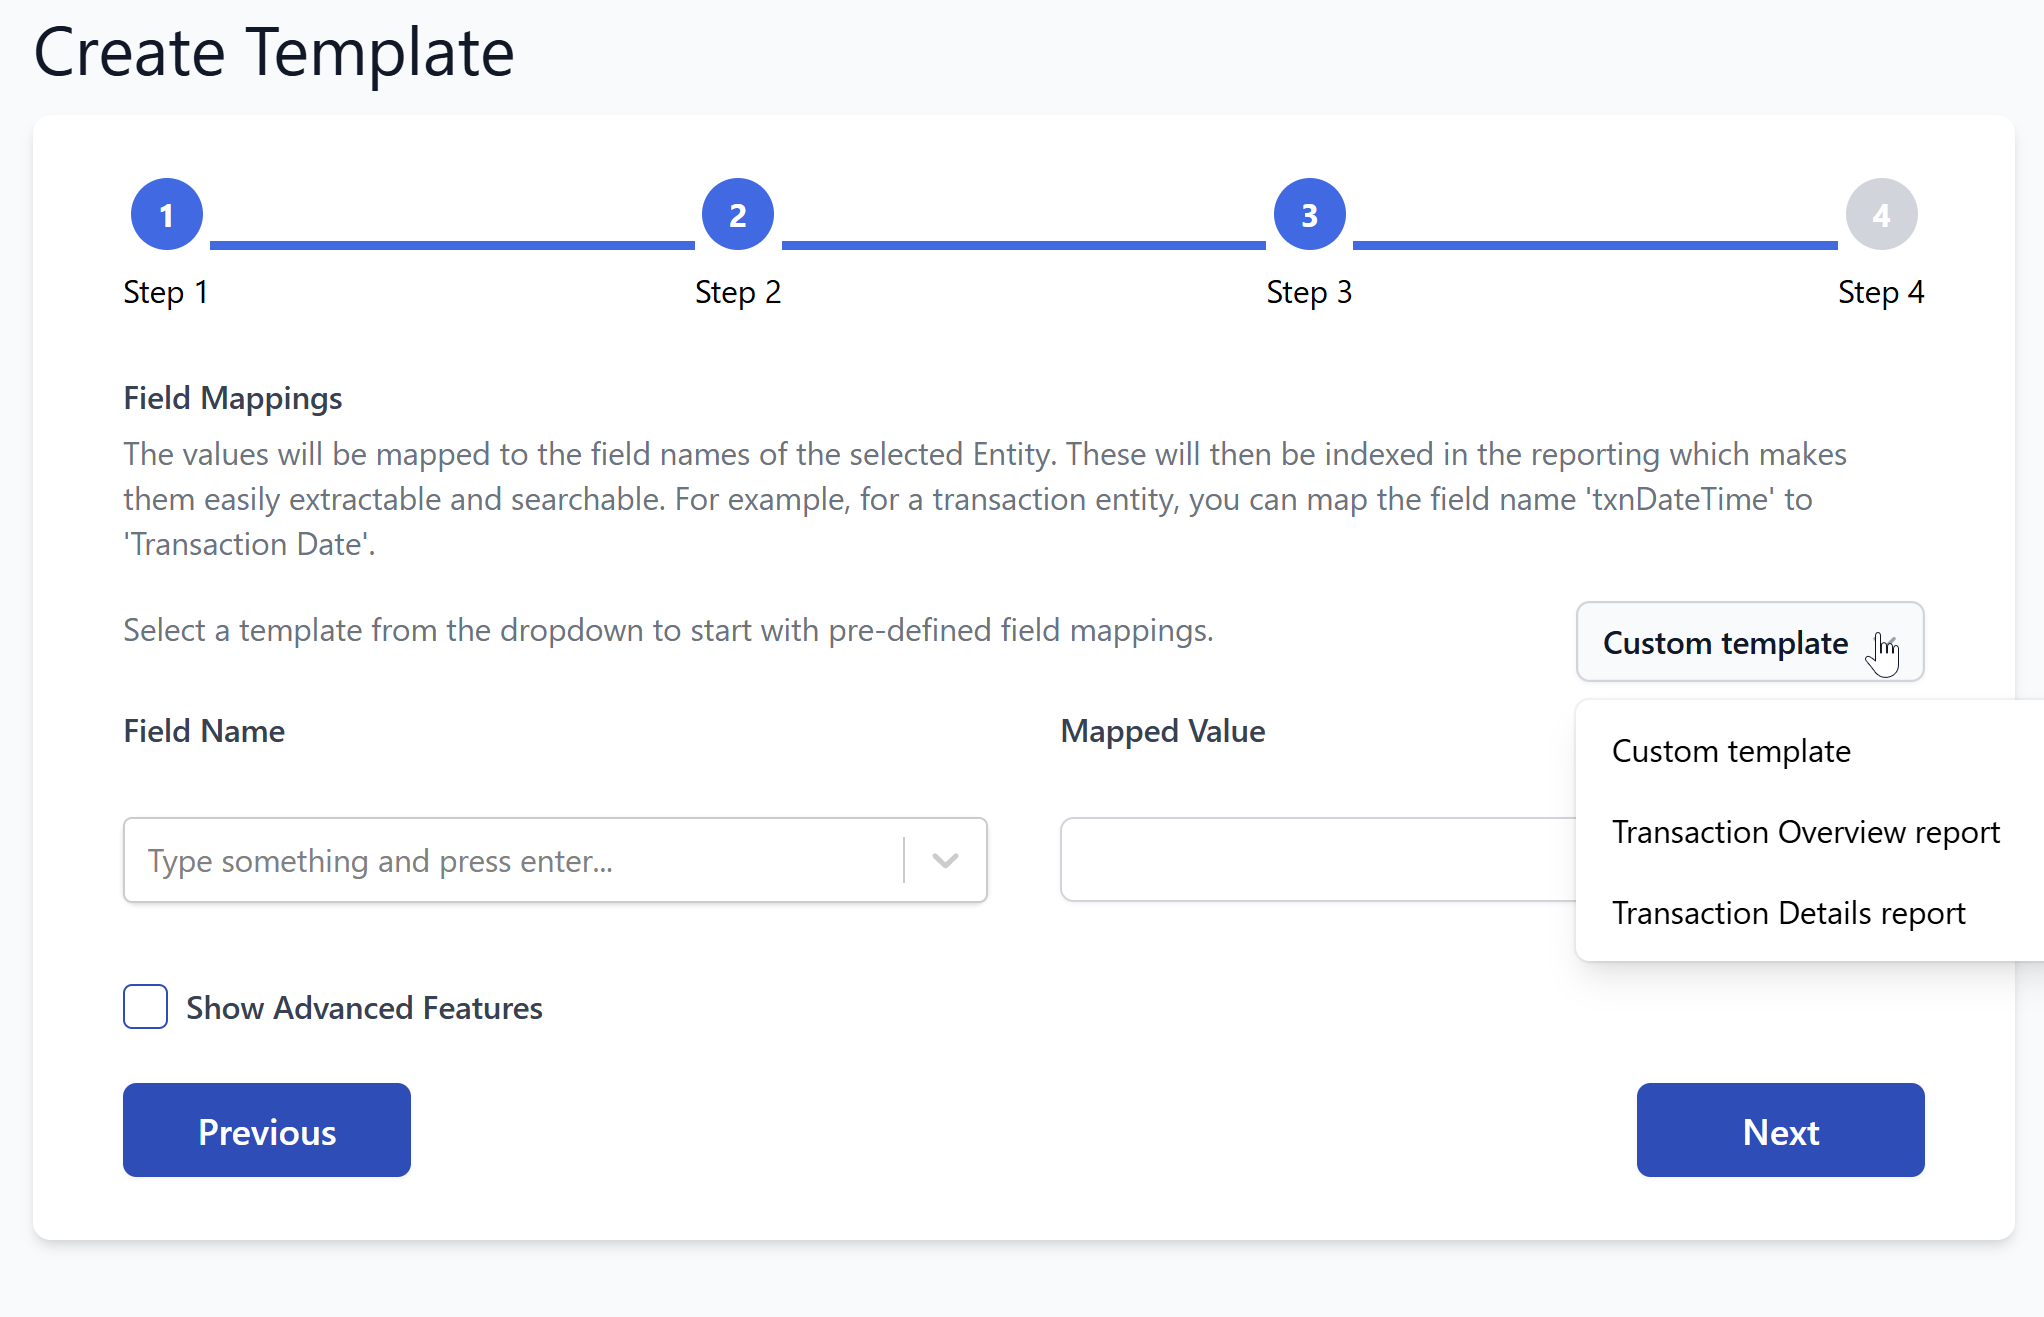
Selecting Transaction Overview or Transaction Details will map fields to our standard formats. These can be tweaked further if you wish to remove or add other fields.
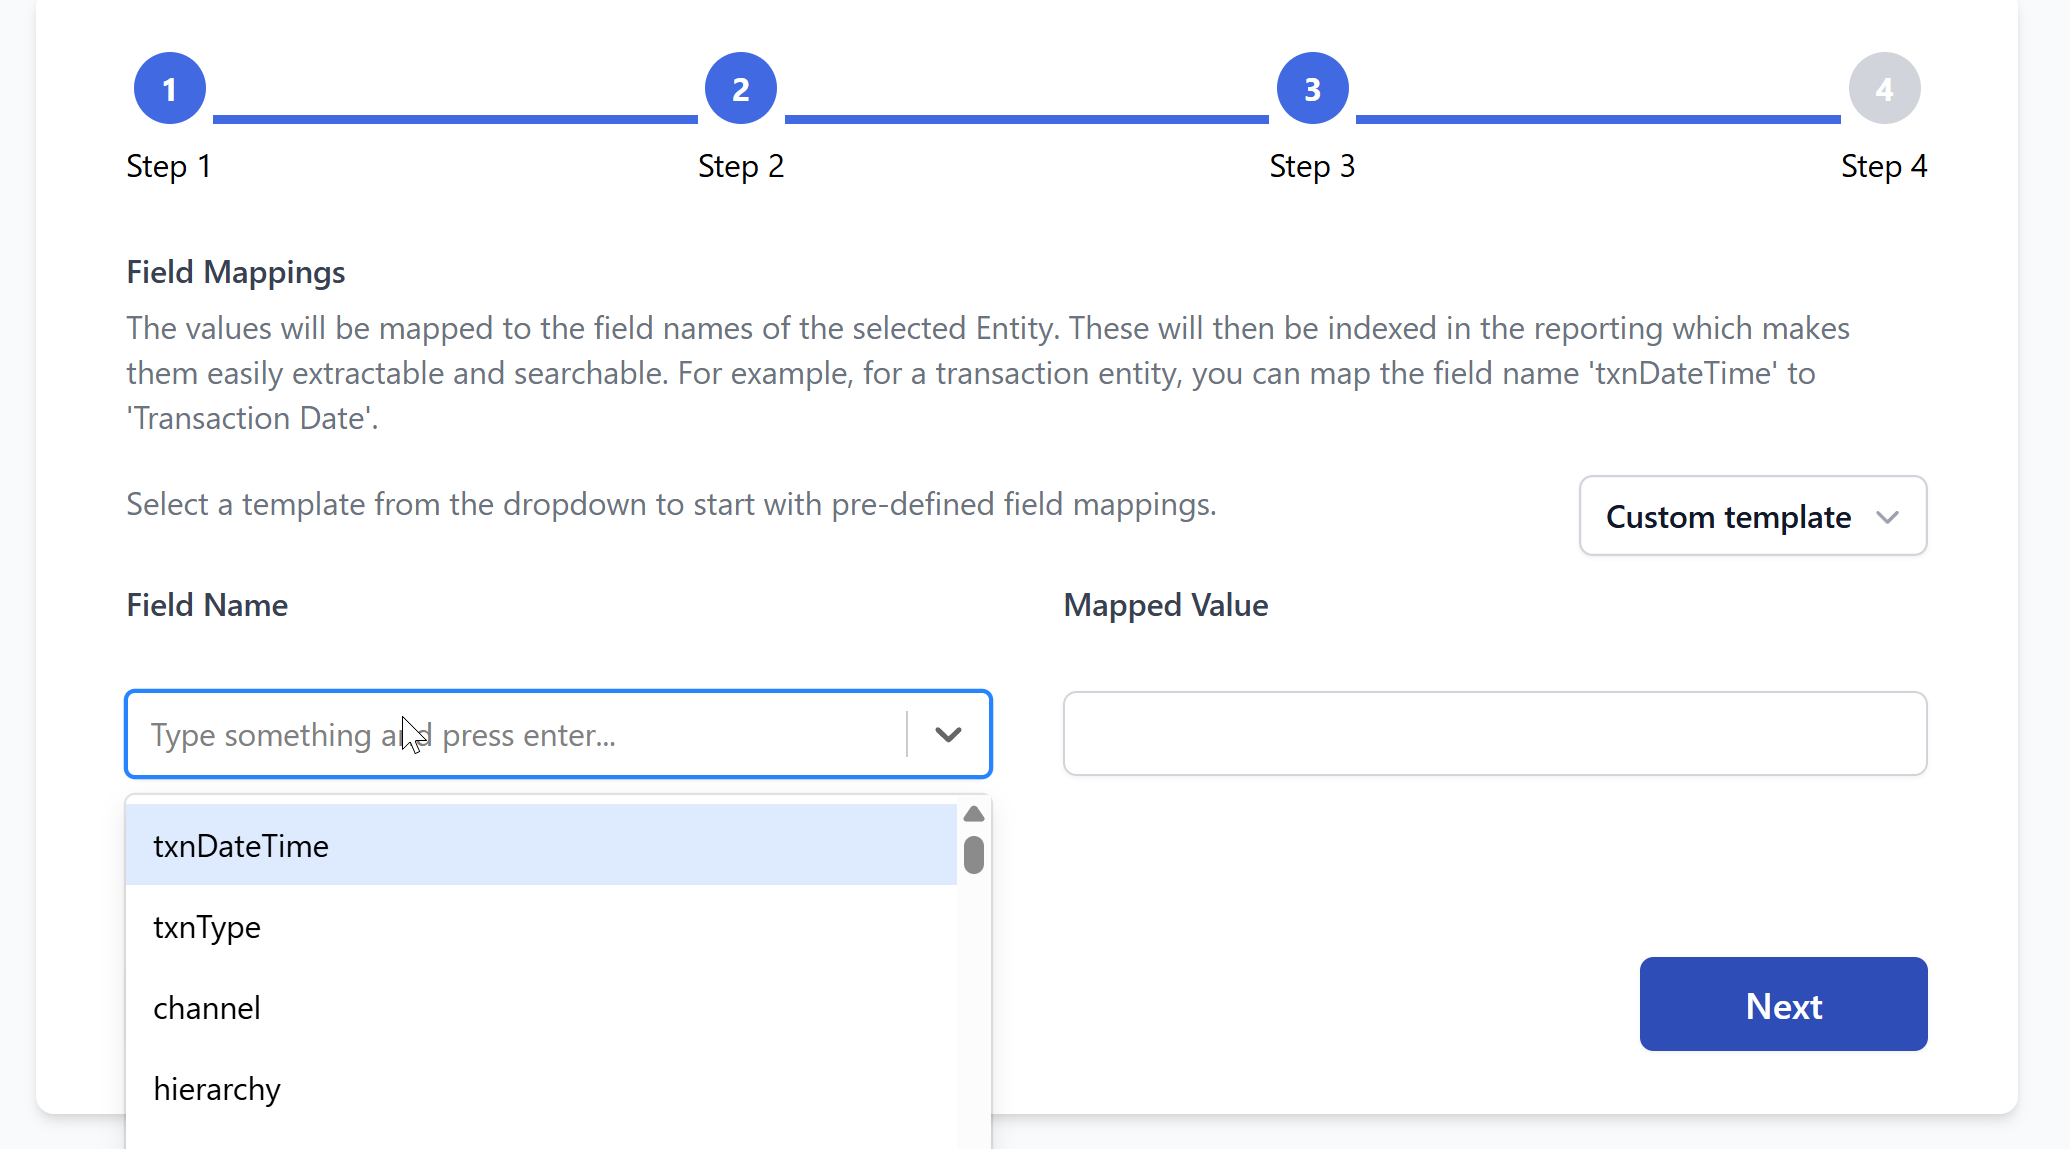
Manual mapping:
You can choose to map the fields yourself by continuing with the Custom template. Selecting a field name will provide a dropdown of common fields. To add this field to the report, select it from the dropdown. The Mapped value field is the name that the csv report will use as the column name for this value.
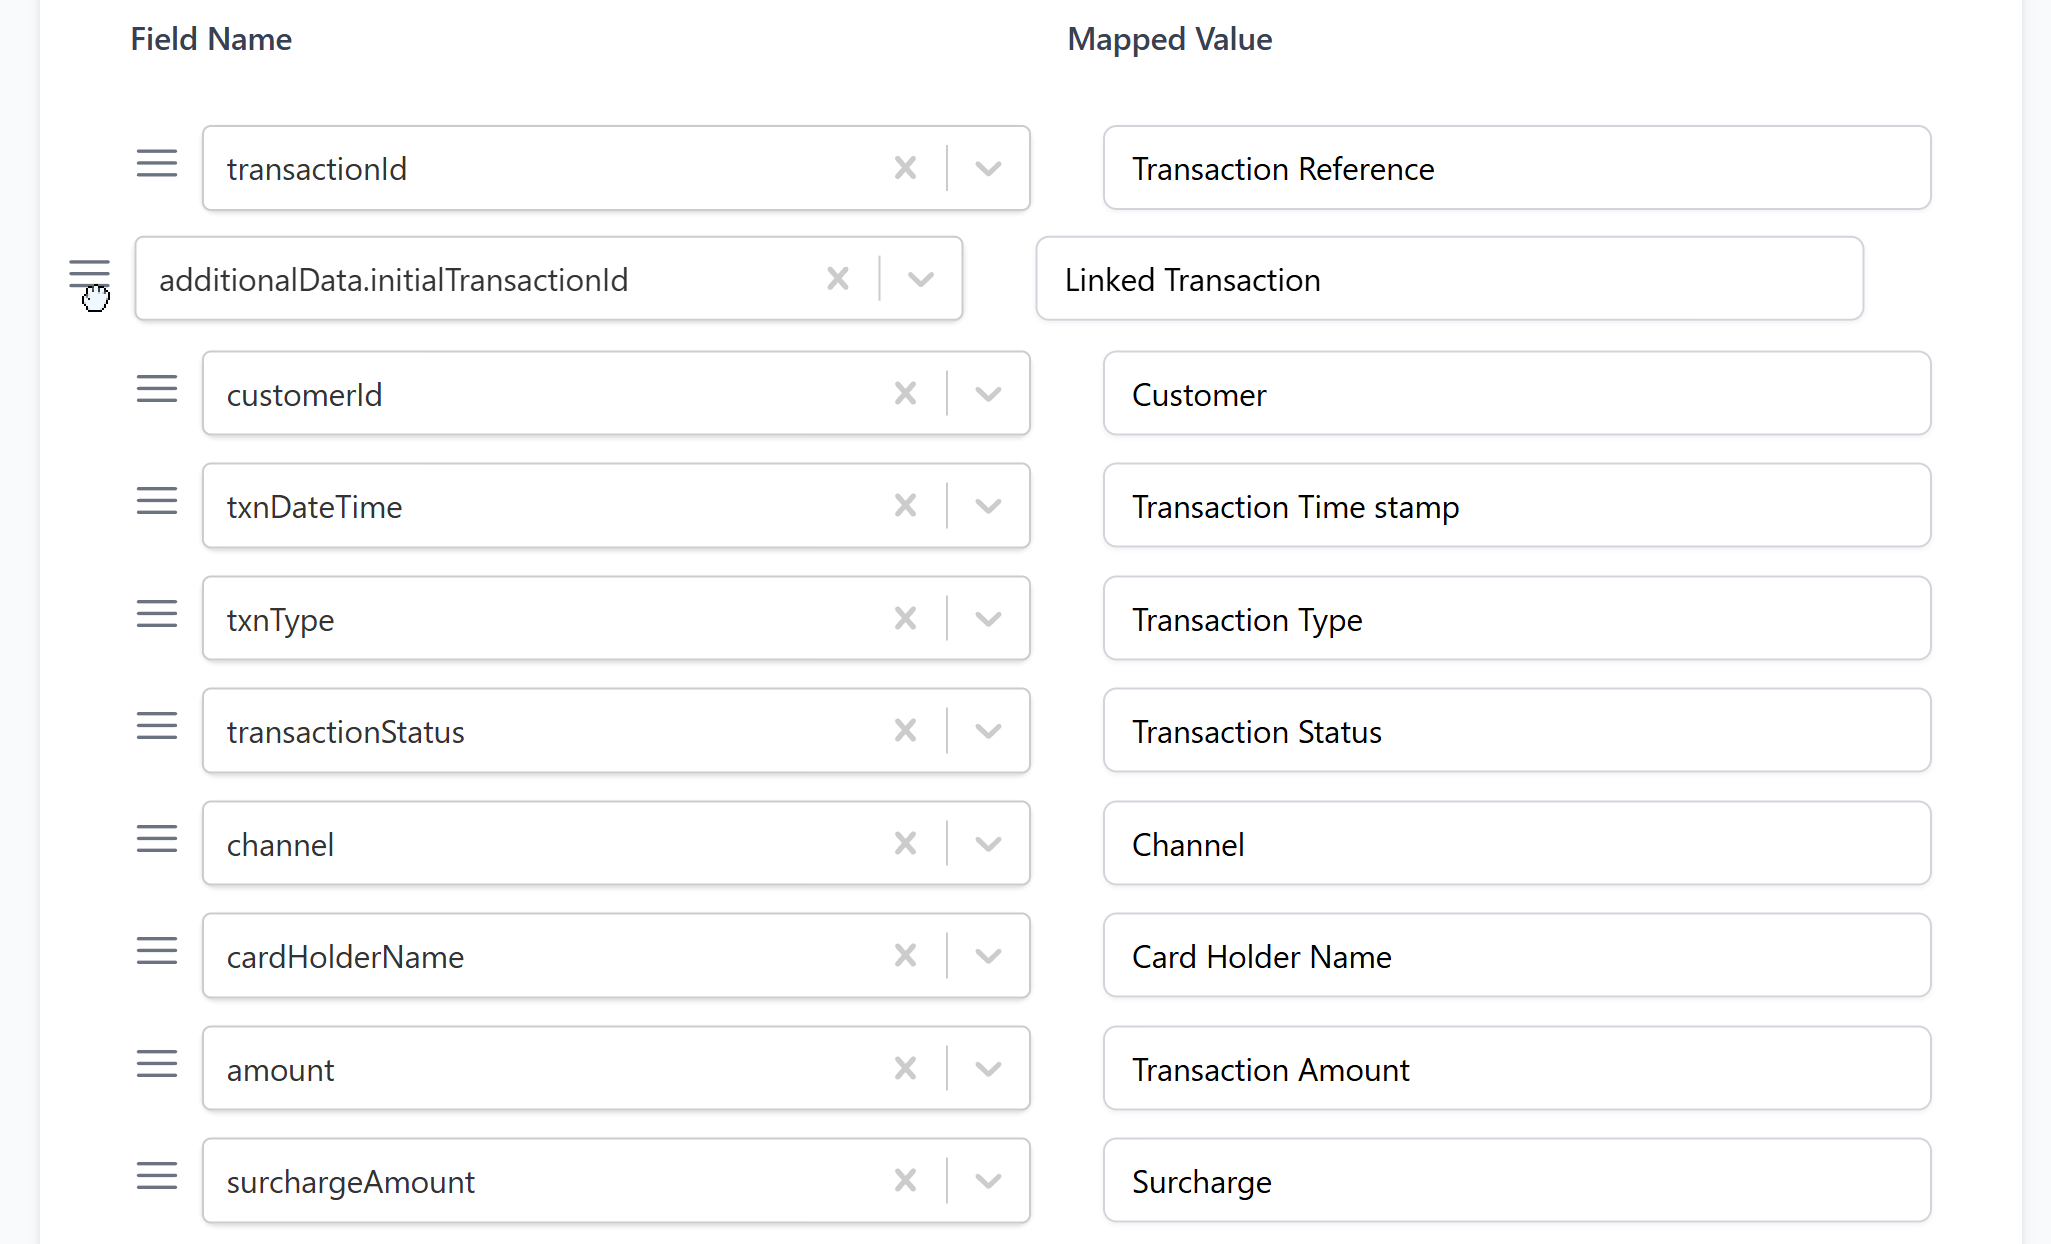
The Mapped Value field must also be populated to receive data in the report. Failure to do this will result in an empty report.
To allow full control over the output of this report, you can order the fields to your preference, note that any reports generated from this configuration will maintain the order that is set here. To do this, fields can be grabbed from the left of the field name to be dragged and dropped to your preferred order.
Select your report frequency (ad hoc)
At this point you need to select your report frequency. If you would like this report as a one off download, leave the Scheduled toggle as disabled.

The Date range picker will be used to generate the report for transactions that occurred within this range
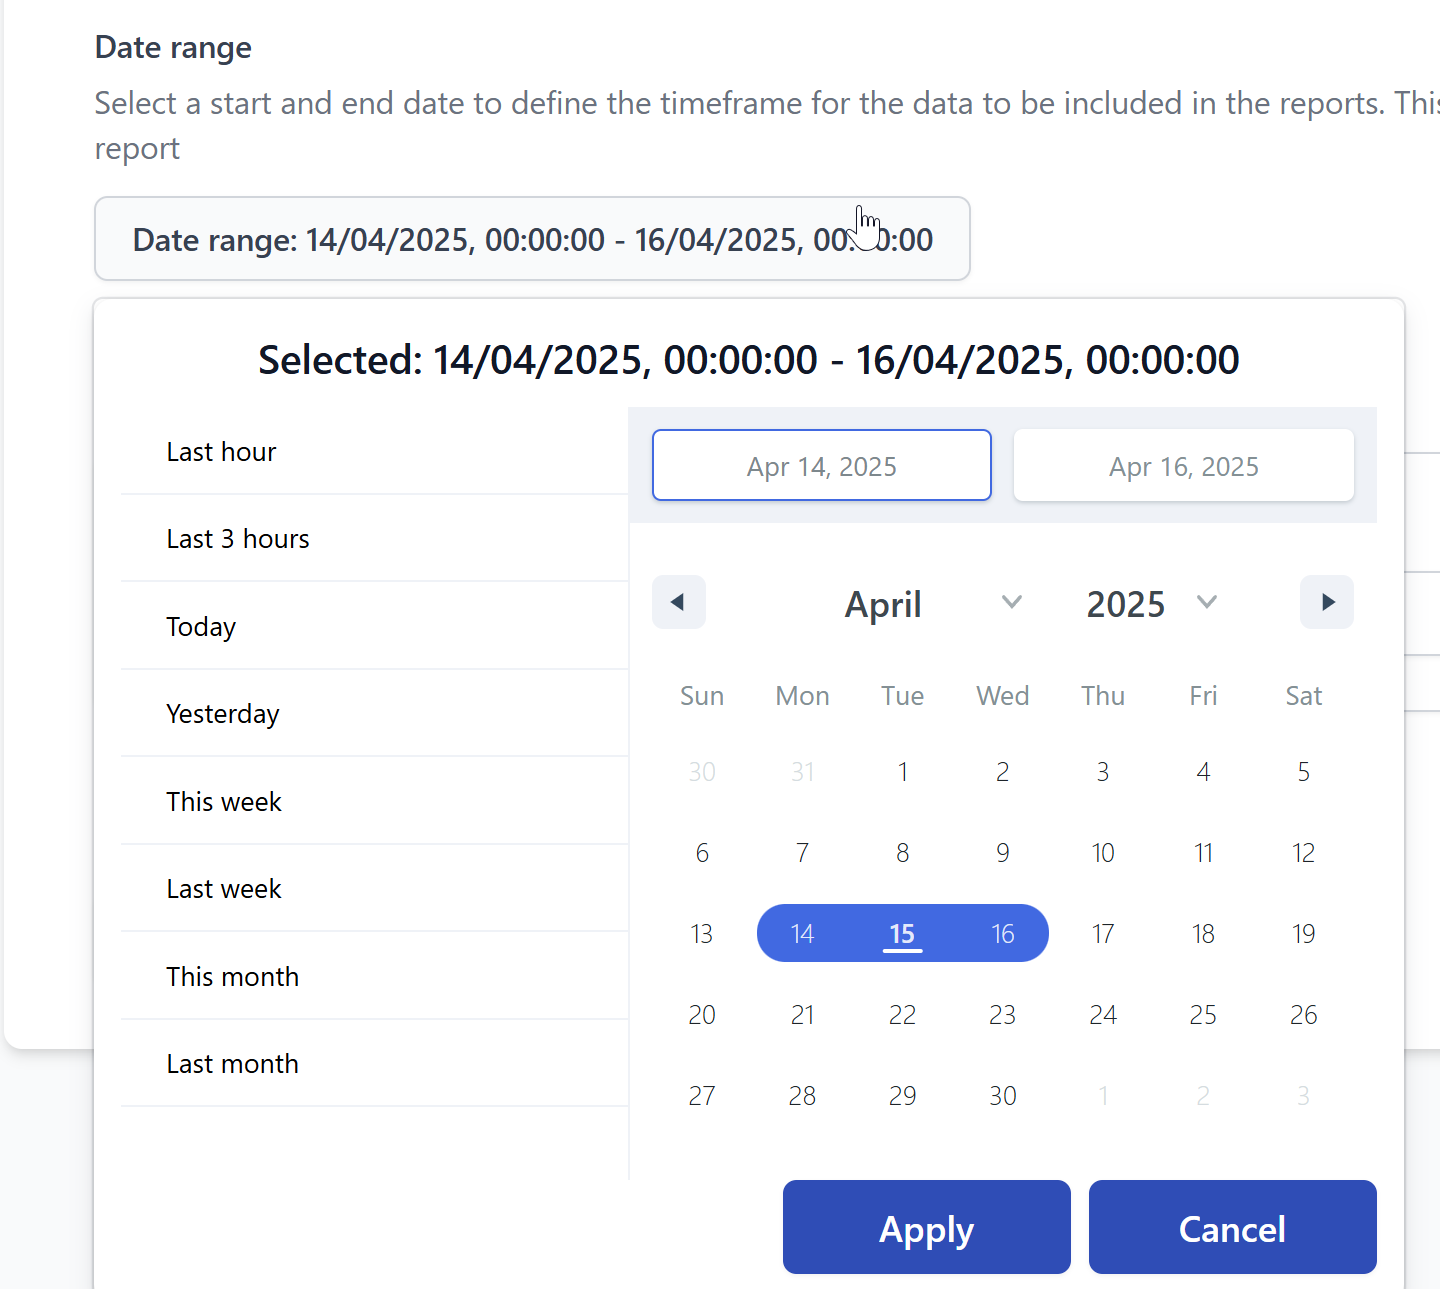
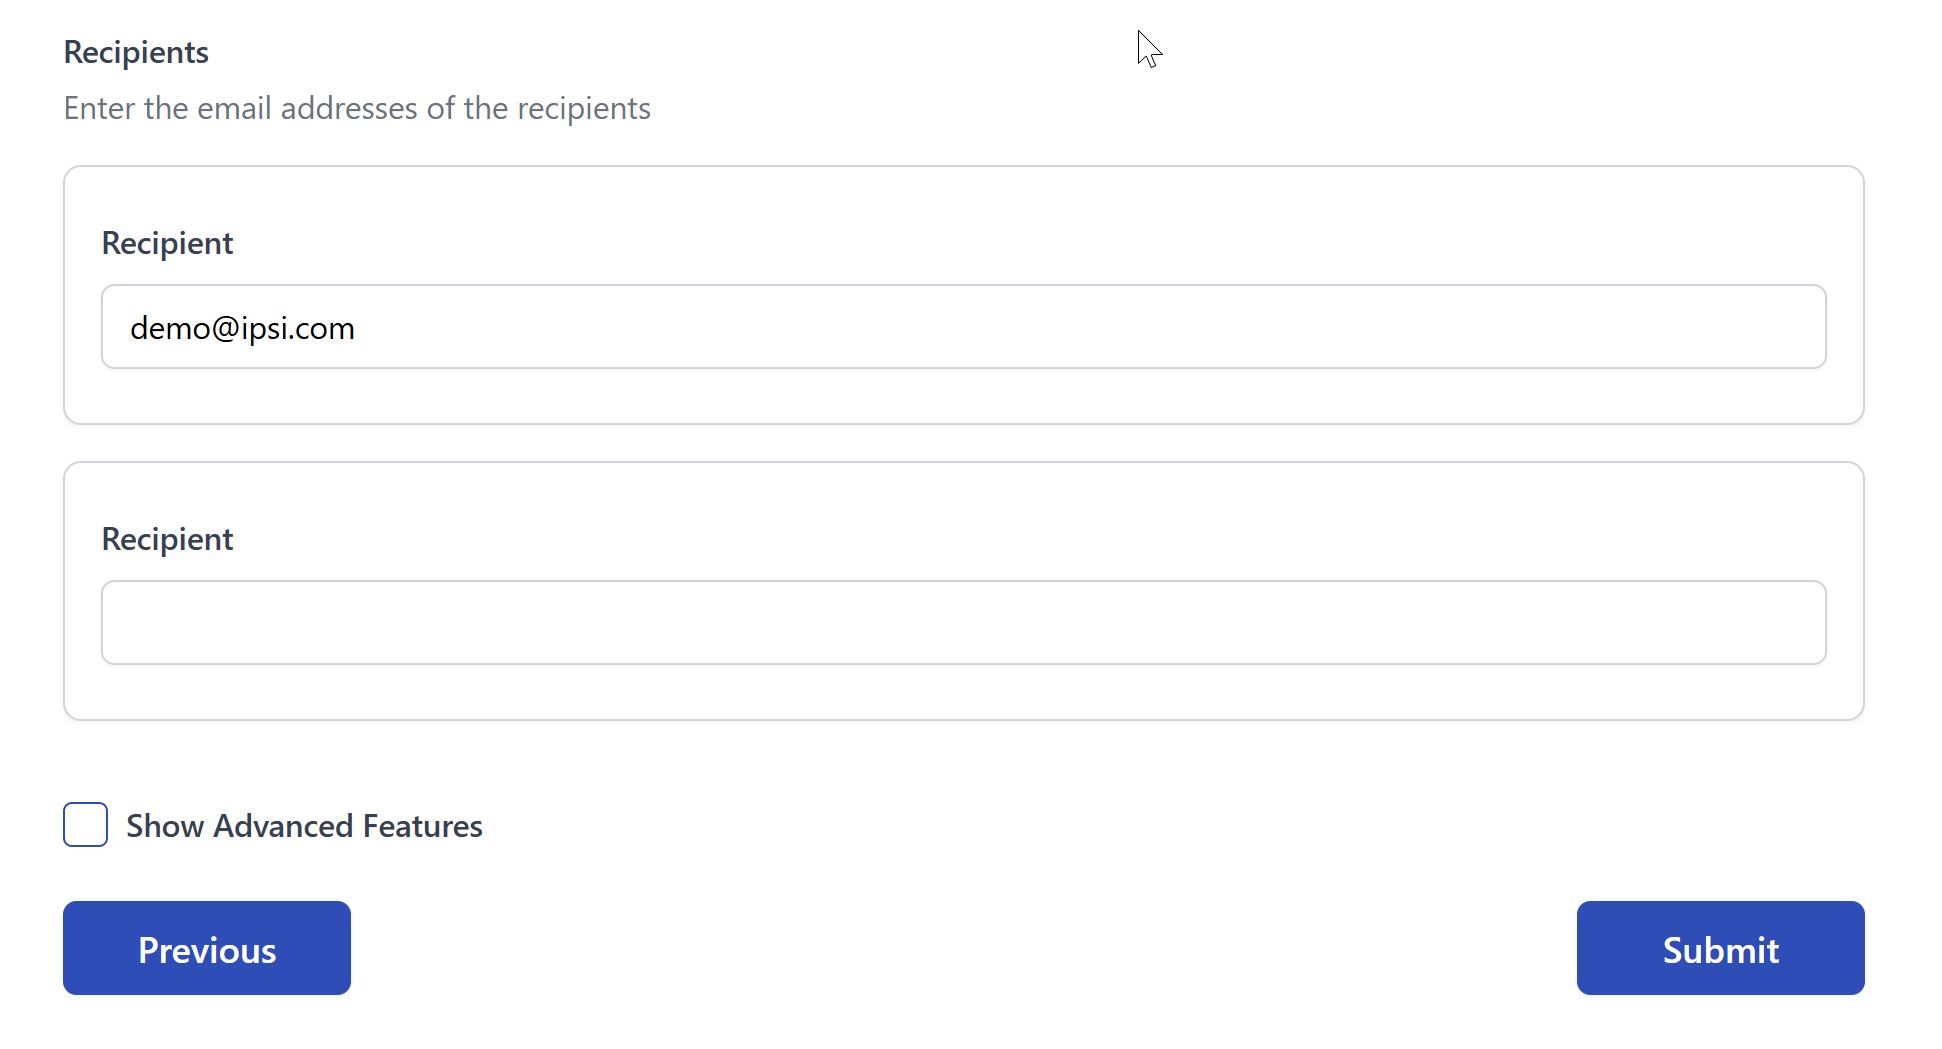
You are required to provide an email (or emails) that will be notified upon completion on the report which will also contain a download URL
Once ready, press submit to request an ad hoc report.
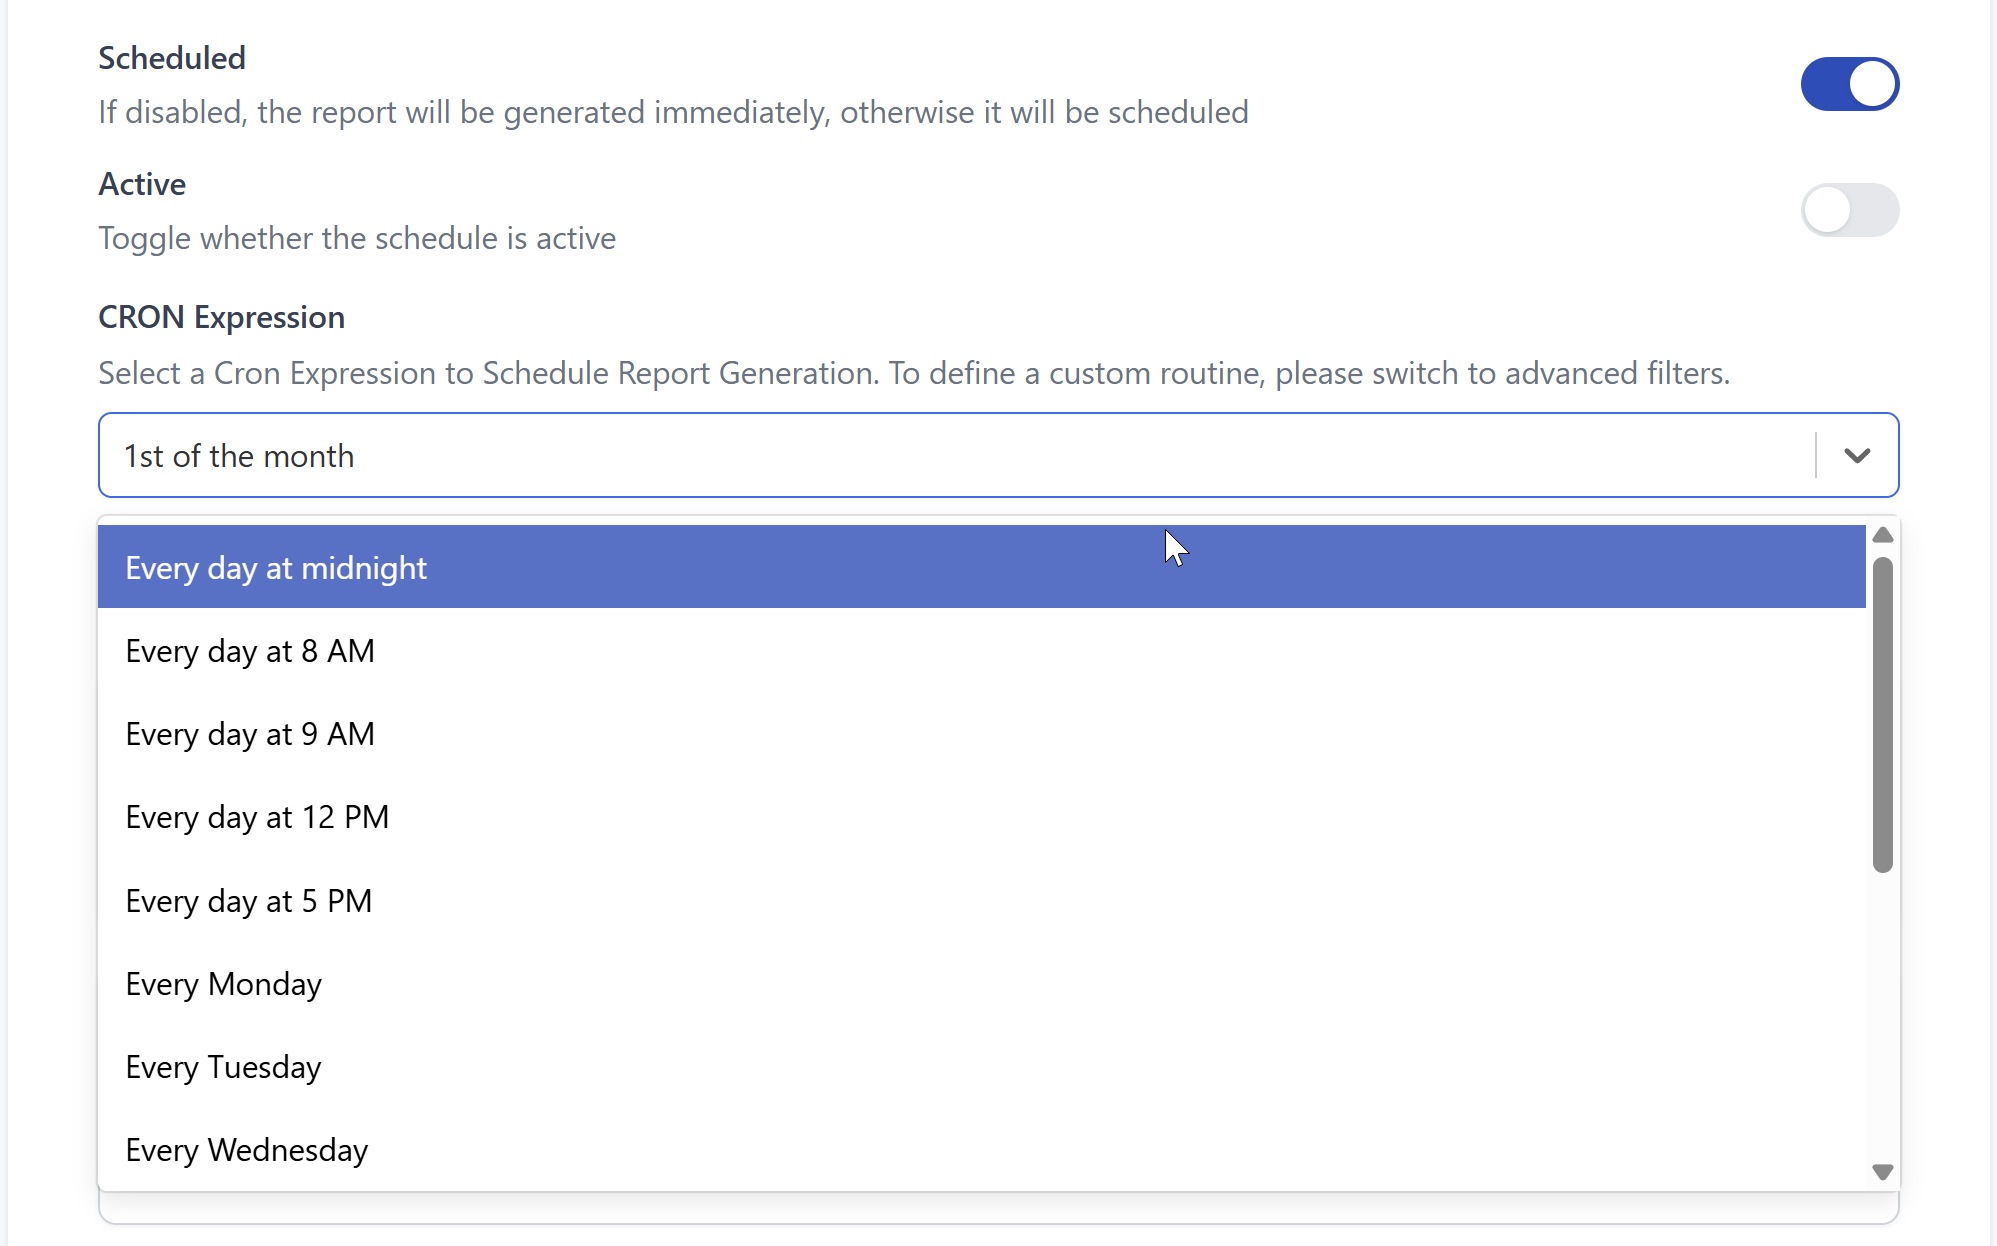
Select your report frequency (Scheduled)
If you would like a scheduled report you have a basic and advanced option.
In the basic option you have some pre-defined schedules setup for you:
For the advanced option you can set a complete cron schedule (tick advanced features at the bottom of the form):
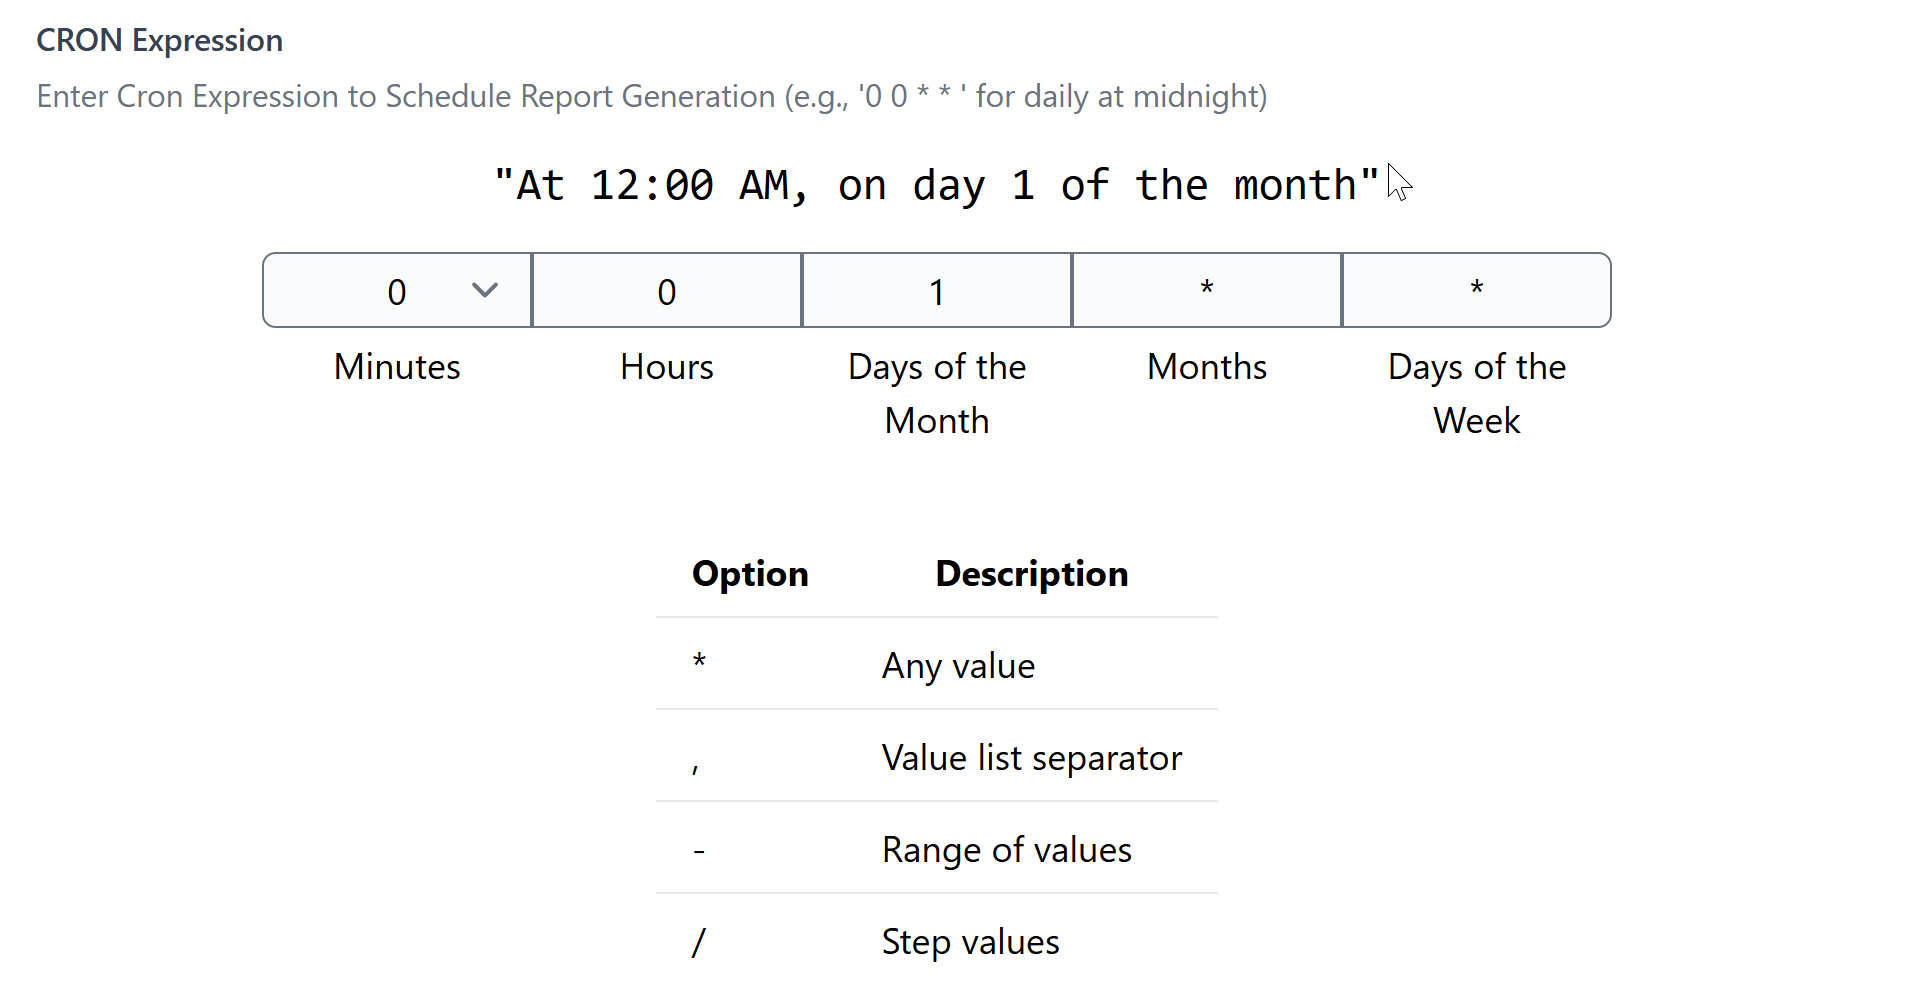
Selecting a frequency and submitting the form will trigger the report to generate at the stated time containing transactions between each time the report generates. I.e. selecting a report to run at 12PM every day, will run each day at that time and contain transactions for that 24 hour period prior.
Please note all timings are in UTC.
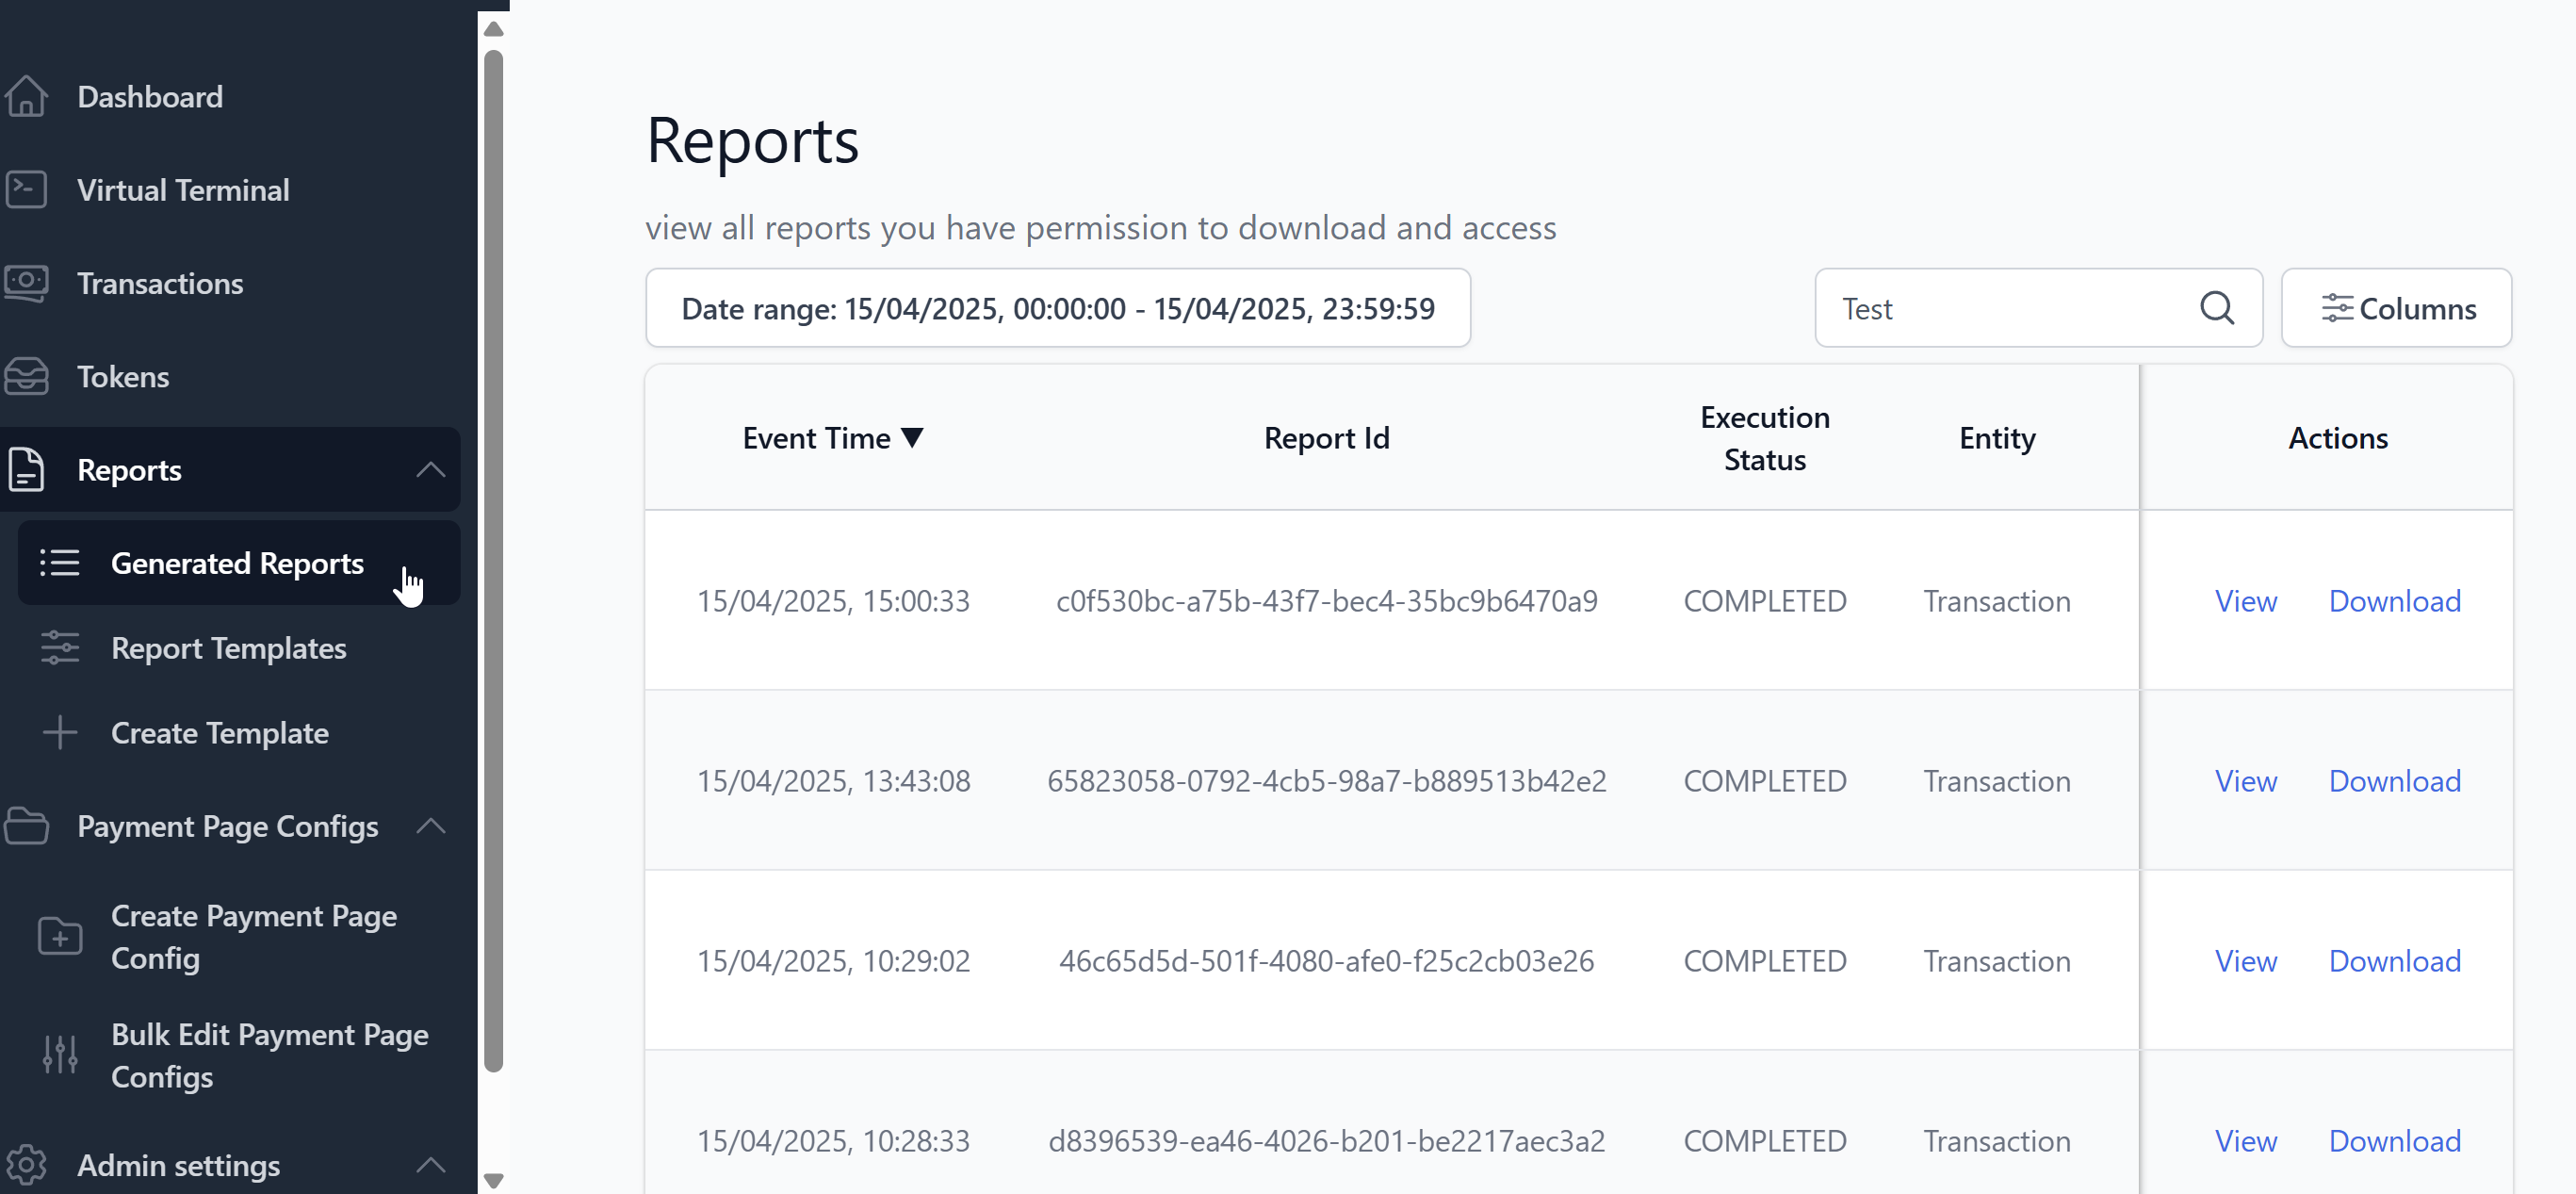
Downloading your report
Whether the report is ad hoc or scheduled, an email notification will be sent to the nominated email when a report has finished generating. This email will contain a URL to download the report.
Alternatively, you can go to the Generated Reports section within the dashboard that will have the list of generated reports. Please note these are filtered by date of when the report was generated. A job that is completed will have a download button.